How I installed Pfsense for my home network Part 2
Disclaimer: I am by no mean a professional. I am just doing this for fun and enjoy learning along the way (I probably still don’t know anything 🤣). These are not meant as a guide and should not be treated as such. What I am showing you here is what I did, and it worked for me and my situation but might not apply to you. Your result could be very different from mine. Heck, I could be doing or saying something entirely wrong since I’m still considering myself a newbie (Hence the name of my site “noob to networking” 😉). Please don’t take a random person’s words on the internet too seriously, and again, ALWAYS and I mean always do your own research (Well, take this one seriously, though).
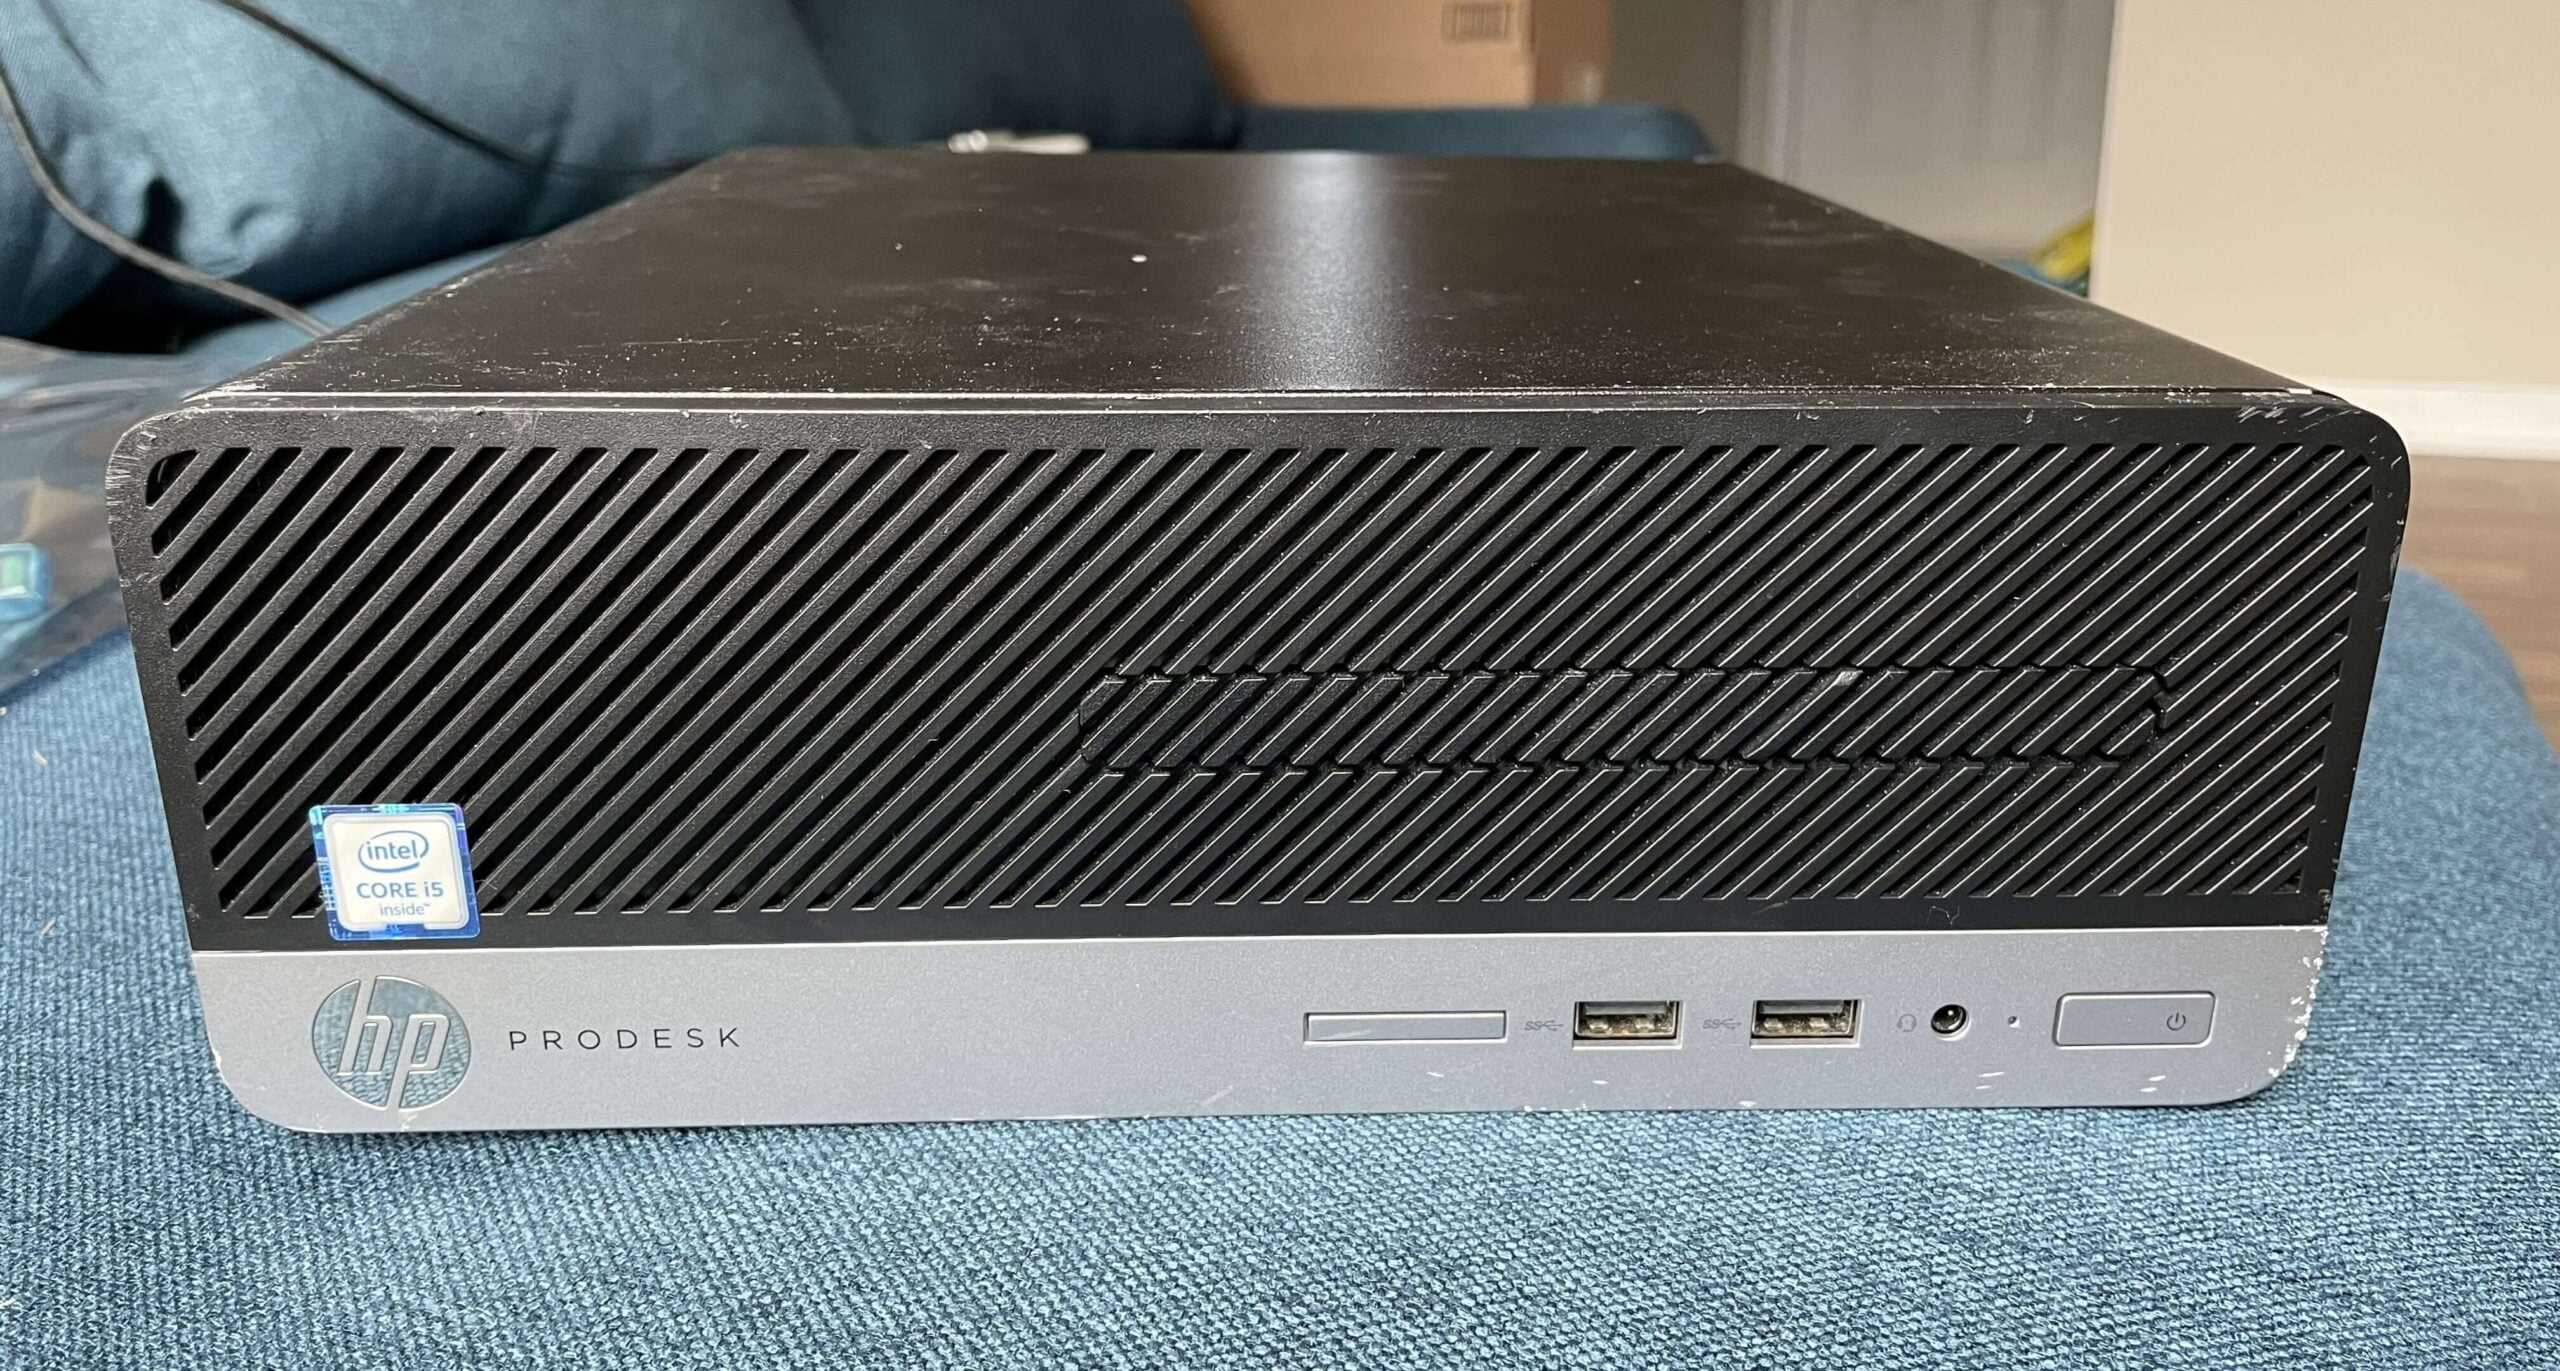
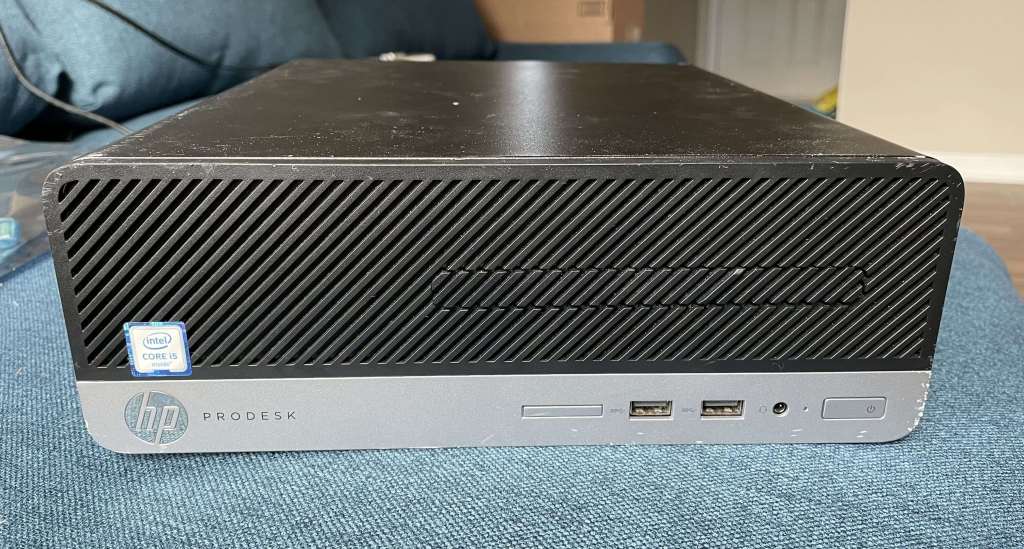
Meet my Pfsense box. What makes this special, you ask? Well, nothing really, other than the beat-up outer appearance. It is a competent machine and serves its purpose.
Happy Monday! Sorry for the late post (well, more like an entire week delayed post) 😛 but fear not. I finally got around to writing this week’s post. Now here we are; what are we supposed to talk about again? Right, Pfsense. So in the last post, I briefly talk about how I want to configure my home network, and Pfsense is my choice for firewall/router. Let’s talk about it, shall we?
The Hardware
As always, you have to start with the hardware. Don’t let those terms like routers, firewalls, or servers… scare you. They are just a computer. EVERYTHING IS A COMPUTER, in a sense. So yea, no doubt my Pfsense box is just a computer as well. As you can already tell, I am pretty cheap but also want a lot of performance (more than the intended purposes). You can say it is a bit overkill, but I take performance per dollar very seriously, and that led to my decision (of course, sometimes due to impulsive purchase, but we don’t talk about it)😉
So what is the requirement for the Pfsense box again? First, it needs to be an X86 architecture of CPU . in case you are not sure what they are. There was a short mention of them in the Noob 101 lesson about CPU (it totally not a shameless plug, I promise 😝)
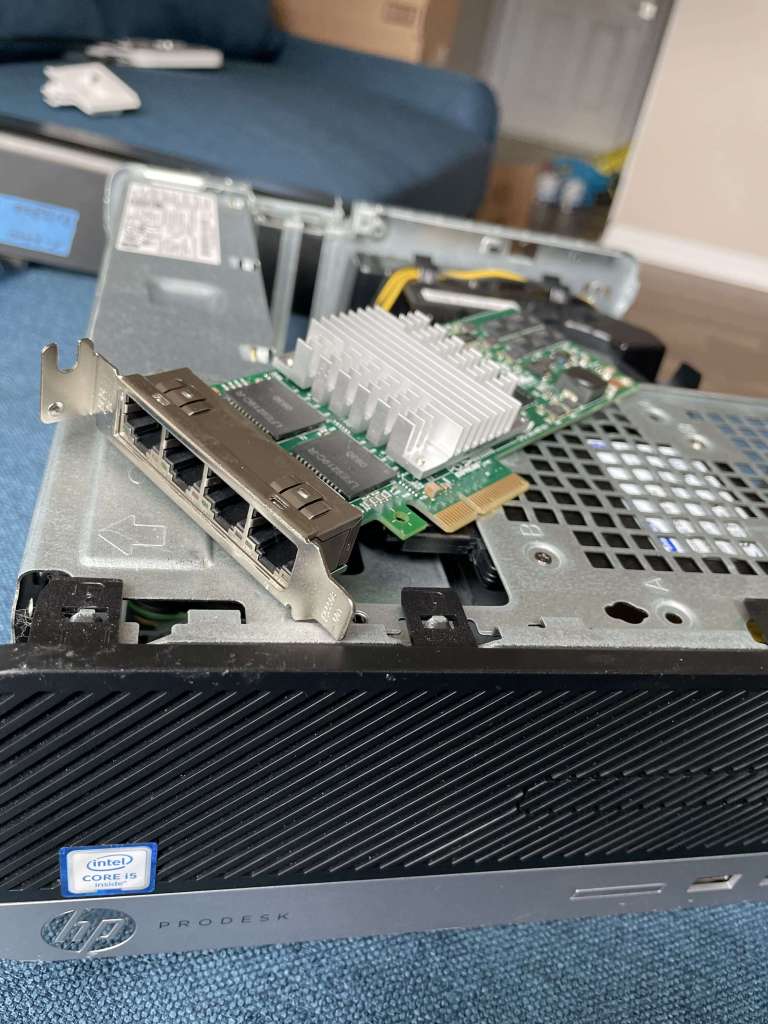
Second, you will want to have at least 2 network ports. Why, you ask? Because you need one to connect to WAN as an input and another to output LAN. It is recommended to have a network switch to take the LAN ports from Pfsense so that you can connect multiple devices to your LAN unless you only want 1 device to be connected (hey, you do you, I don’t judge 🤷♂️) Most of the time, the PC you have only come with 1 network port so what do you do? As long as your PC has a peripheral component interconnect express or PCI-E slot available in your motherboard, then you can add a network card and have more network interface ports. If you are unsure what the PCI-E slot looks like, it is the slot where you connect your graphic card to your motherboard 😉.
This is my network interface card or controller (NIC). It connected to my PC and gave me access to 4 extra network ports. This is the RJ45 variant (the most common one) because the most home network is connected via RJ45 cable. I will only be using 2 ports on this NIC – 1 for WAN and 1 for LAN.
That is pretty much it. If you have an old office PC lying around or can find one for cheap, it will be a great Pfsense box that you can build for cheap. I found my HP Prodesk off eBay, and it was rocking 6th gen Intel i5-6500 4 cores- 4 threads (A very capable CPU even now). 8 GB of DDR4 RAM and 256GB of Samsung SSD, The best part? I got this machine for less than 100$. And since I want to overkill everything, I bought another stick of 8 GB RAM and made this into a 16GB of RAM PC. I also bought the network card for around 20$. In total, I spent around $120 on this setup. Not bad at all, I mean if you look into other options for firewall/router. Sure, you might find some for around 70-150, but they are very weak specs-wise and aren’t that secure. Furthermore, wouldn’t it be cool to be able to have a very powerful router that you “build” yourself? I think so.
The Software
If you got this far, you must have hardware ready to install Pfsense on. Also, I assume you know what you are doing or think you do😛. I have no idea what I am doing, so joke on you if you think otherwise 😜. With that said, with the hardware time to install the software, and in this case, it is Pfsense. Pfsense will be installed as a software package of the FreeBSD operating system. Don’t worry about understanding what I was saying; It is just an FYI. You can say installing Pfsense is like installing an operating system (even though it technically isn’t an operating system, but I don’t think people would fight you if you say it is). If you are new to my website, this would be the first for you, but if you have been here before and read a few previous posts about installing the operating system. They worked in a very similar way. Here are the steps:
Make a bootable USB flash drive
Install the Operating system on the internal drive.
Profit? I mean complete the installation process and run the inital set up.
Make a bootable USB flash drive
I’m sure you have seen this done a million times already, but well, here we are again. As usual, here is the list of items you will need:
A USB flash drive (duh)
A computer for you to make a bootable drive with (we been going over this for alot of time already so I’m sure you get it by now)
A brain or something close to it is fine too.
Navigate to Pfsense’s main website at https://www.pfsense.org or if you are too lazy to type in the URL, click HERE. Click on the Download Tab.This shows the download page.Select the following options to start the download, and you can pick whatever mirror is close to your location as it is just which server you want to download from for the fastest download. Hit download and let it do it thing. If you have fast internet like me (humble brag), it will only take like a few seconds, but your mileage may vary (totally not depend on how much you pay for speed or anything 😛)You will also need tools to create your bootable drive. My choice is Rufus, but you can pick something else like Balena Etcher…Navigate to the website and hit Download Rufus.Should you see something like this, hit Download (Portable).Now that we have both Pfsense and Rufus downloaded. Lunch Rufus, select the USB flash drive. For my case, my USB flash drive is no label with 32GB, which is more than enough for Pfsense. You can get away with a 1GB flash drive (if they even sell one with that low capacity nowadays).Hit Select and choose the Pfsense downloaded. Hit Start to begin the process.
Do you remember what we need to do next? That, right? Make sure the PC you want to install the machine on has the correct boot order, and it will be able to boot into the USB drive. You can do that by changing the setting in the Bios, but most of the time, they work without you need to do anything (other than plug the USB in, of course).
Installing the operating systems into the internal drive
I assume you know how to plug the bootable USB drive into the machine. You should see it show up like this (after the initial sequence). Hit ENTER to continue.Well, of course, we want to install Pfsense. Hit ENTER and don’t ask too many questions.The default setting worked for me unless you have different needs, so hit ENTER to continue.This prompts what file system you want to install on. I recommended ZFS as it was prone to be more reliable if the power went out frequently. I am speaking from my personal experiences on how my Pfsene box was corrupted using the UFS file system. But if you have a hard time installing the ZFS, then maybe trying to UFS could be an option. Hit ENTER to continue.Hit ENTER to proceed with the installation.I picked stripe because I like to live dangerously 😎 but if you have 2 or more drives on your PC and want to keep your data safe, go for different options—hit ENTER.To select the drive, Hit the Space bar, then hit ENTER.Well, this is pretty much self-explanatory—hit ENTER.Another warning, I guess—hit ENTER.Watching the progress bar filled up is pretty satisfying, not going to lie.I picked no since there isn’t much I want to do with the shell.The installation is completed. Hit ENTER to reboot.While the reboot process is in progress, remove the USB flash drive from the computer so that the next time it will boot into Pfsense on the internal drive instead of the USB drive.After the whole installation process, Pfsense is installed, and the boot screen should look like this. Normally it should boot automatically after 3-5 seconds, so there is no need to do anything, but if you know what you are doing and wish to select other options, then, by all means, go for it.This is what we should expect to see. I did not plug in my WAN ports yet that why I do not have a public IP address showed up. The private IP is 192.168.1.1. igb0 and igb1 is the network interface, basically which network ports were assigned (you can change which interface does what using option number 2). But yea, just making sure the correct network cable is connected to the right network ports, and you should be good. You might have to pick what the interface does during the initial boot in some rare cases. That is why I suggested you see this screen first before heading to the web interface.
So once you figure out which one is ibg1, connect that into a computer or a network switch like us normie 🤪. This is the process to configure Pfsense using the web interface. You can absolutely be using the VGA interface and still be fine, but I like to work with beautiful graphics, so I’m going to use the web interface. I connected the igb1 to a network switch and connected one of the ports on the switch to my computer using an ethernet cable.
Initial configuration for Pfsense.
Go to a web browser and typed in 192.168.1.1, and hit ENTER. It will show something like this if you don’t have an SSL cert set up telling you this connection isn’t secured. What is SSL? well, it is an encryption protocol to ensure hackers and bad actors don’t easily steal the information you entered into a website. I won’t go into detail, but that is its basics. Since we know this is safe (we are the host, after all, 🤷♂️ It not like we will get our “personal” information stolen by us as if we don’t already know about ourselves 🤪). Select the Advanced.Yes, yes, I wish to continue to proceed to 192.168.1.1.Tada, this is the login screen for our PFsense box. Since this is the initial setup, the default username is “admin,” and the password is “pfsense.” If you don’t remember, google pfsense default login 😉Welcome prompt. Hit Next to continue.This is how I set up my Pfsense, the hostname (my Pfsense name), the primary Domain name system (DNS), and secondary DNS. I picked 1.1.1.1 (Cloudflare) and 8.8.8.8( Google) for my DNS. Also, don’t forget to untick the overwrite DNS option.This is to ask you to pick a time server. What is a time server, you ask? Well, it is a computer located somewhere on the internet where you will send a request to ask what time is it. It is like when you forget your watch and ask the person next to you if they know the time. The default time server is fine. Also, please select the correct timezone so your time won’t be off. one time, I forgot to pick the correct time zone, and I was looking at the time, and I was like, this isn’t right, or am I tripping 🤪I picked the correct time zone this time 😤 hit Next.I assumed that you already had your WAN connected before doing this. This configured the WAN interface, and I hooked the WAN port into my internet service provider’s modem. For the type, make sure to select DHCP (I won’t be explaining what it is now, maybe I will talk about it in the future post).Ideally, you always want a direct connection to the internet with Pfsense, but sometimes things are beyond your control 🤷♂️. Please scroll down to the bottom of the WAN configuration page, and there are the 2 options you should be paying attention to, and don’t make the same mistake I made. For my case, I connected my Pfsense directly to my modem, so I have my option ticked as shown. But if your situation is where you are assigned a private IP address instead of a public one, like sometimes the ISP gives you some crappy modem/router combo, or you don’t have access to the network that you are using (rent a place or apartment complex). Make sure the options are unticked.The next step is to configure the LAN interface. You want to pick your LAN IP address. It could be 192.168.x.x with a subnet mask of 24. For me, I picked 10.11.50.1/24 for my IP. It means that if I connect my devices to this network, I will have the IP address from 10.11.50.1 to 10.11.50.255. So it is plenty of IP address to go around 😜. Not to mention Vlan (which I will talk about it in a future post),The next step is to pick the password for your login. If you want to keep the default password…I was just kidding; Please don’t do that. Pick a secure password since you don’t want unauthorized people to change your configuration and set your things on fire, do you?After you finish, time to reload to apply the changes.Now we wait. If you count up to 300 sheep and there is nothing changed, try to refresh the browser, you will be greeted with a surprise 😈Surprise? You can’t access the web interface anymore 😛. Why? Because our LAN is no longer 192.168.1.1. We changed it remember? The problem is our PC still thinks that we still have the IP address 192.168.1.x, so there was an error when we tried to reach the Pfsense box.My PC is a Windows 11 PC, but you can do it with any computer operating system (the command might be slightly different). So yea, access commands Prompt on Windows.The first command is ipconfig /release . This does release the current IP address that the PC currently has.So after releasing the IP address, let’s acquired a new IP address. We can do that by using the command ipconfig /renew . We should now have an IP address of 10.11.50.x . Head back to the web browser.Type in 10.11.50.1 (the address we assigned for Pfsense during the initial setup). It is now showing up.Login to Pfsense with our shiny new password (you did set a new password, right?), and you should see the dashboard. This is the main dashboard. If you see the Public IP address show up in the WAN interface, we should access the internet.
Congratulations, if you made it this far, meaning you should have a brand new firewall for your home network. If not, I hope this has been informative enough to make it worthwhile. Pfsense is a very powerful firewall, and we can do a lot with it when creating our firewall rules for better network security. I am still learning about it myself, and I would be happy to share some of what I learned, insignificant as they might be. Until next time, have a wonderful week.
Thank you for your sharing. I am worried that I lack creative ideas. It is your article that makes me full of hope. Thank you. But, I have a question, can you help me? https://www.binance.com/register?ref=IHJUI7TF
Thank you for your sharing. I am worried that I lack creative ideas. It is your article that makes me full of hope. Thank you. But, I have a question, can you help me? https://www.binance.com/join?ref=IXBIAFVY


4 responses to “How I installed Pfsense for my home network Part 2”
Can you be more specific about the content of your article? After reading it, I still have some doubts. Hope you can help me. https://www.binance.com/register?ref=IXBIAFVY
Your article helped me a lot, is there any more related content? Thanks!
Thank you for your sharing. I am worried that I lack creative ideas. It is your article that makes me full of hope. Thank you. But, I have a question, can you help me? https://www.binance.com/register?ref=IHJUI7TF
Thank you for your sharing. I am worried that I lack creative ideas. It is your article that makes me full of hope. Thank you. But, I have a question, can you help me? https://www.binance.com/join?ref=IXBIAFVY