
Hello there, I hope you have a good week. As “usual,” this week is another post. As I mentioned in last week’s post, This week, I will discuss the installation process of my home’s smart thermostats. Let’s get started. Shall we
Understand what you are working with
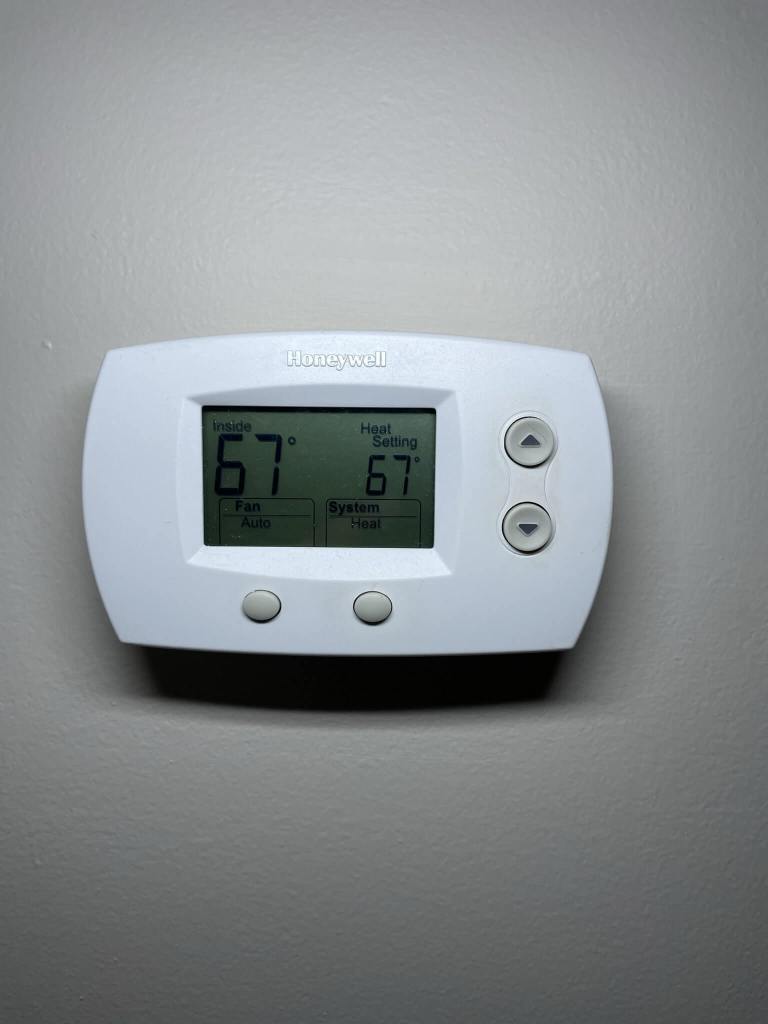
First and foremost, I must know what thermostats are currently installed in my home and if there are any unique situations (such as missing C-wire) that I need to know. I counted myself luckily (for once) since my thermostats look pretty standard, so I do not have to jump through many hoops to get things to work; surprise, right😱? I know. I know you love seeing me struggle to get things to work but hey, at least be happy for me at least once, will you.
So what about C-wire I am talking about? Well, you see, since thermostats are devices that require constant power, you will need a constant power source. C- wire or common wire is the wire that supplies the constant power to the thermostat. Without it, your smart thermostats won’t work because they wouldn’t even turn on 😂. If C-wire supplies power for the thermostat, how come other thermostats worked without a C-wire, you ask? Well, typically, most of their thermostats are battery-powered for the unfortunate few that somehow do not have C-wire connected.
For a simple device such as regular thermostats, the battery’s power is sufficient for their operation. They only need to rely on the temperature sensor and turn on/off the HVAC systems to meet the set temperature. There isn’t much micro adjustment. Therefore, it does not consume too much power, thus explaining why they are okay with being powered by the battery.
Smart thermostats, however, need an internet connection (mostly Wi-Fi). How can you call something smart if it doesn’t connect to the internet? Am I right? 😜. But that isn’t without a downside. Due to the nature of the Wi-Fi-connected device, the smart thermostat must be pinged once in a while to ensure the device is still connected. It is like sitting in class, falling asleep, and getting either called out by the teacher or poked by your deskmate. Yea, you are awake but at what cost? You ran out of energy real quick 😂. All the joke aside, if the Wi-Fi devices aren’t going to sleep, it will chew all the battery in a matter of a few days, and you wouldn’t want that to happen, don’t you? Therefore, all smart thermostats (or at least as far as I know) require C-wired so that it is constantly powered and never have to worry about battery conservation.
Also, it would be a good idea to understand how the HVAC technician wired your system (or make sure you don’t screw it up).
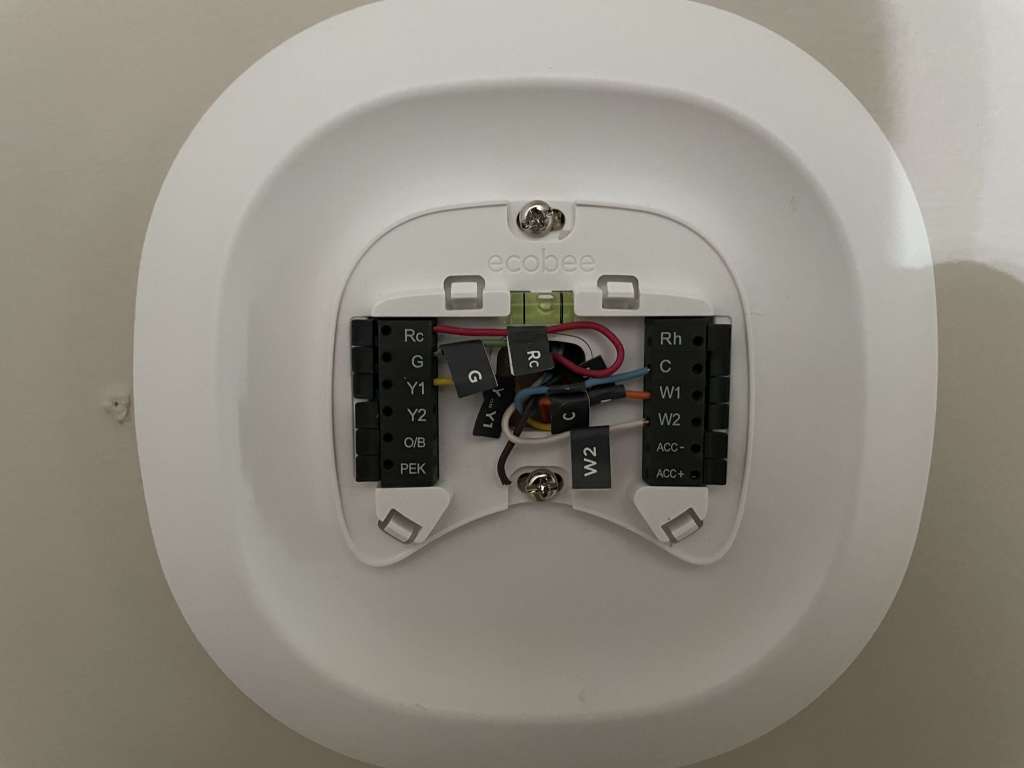
Remove the old thermostat.

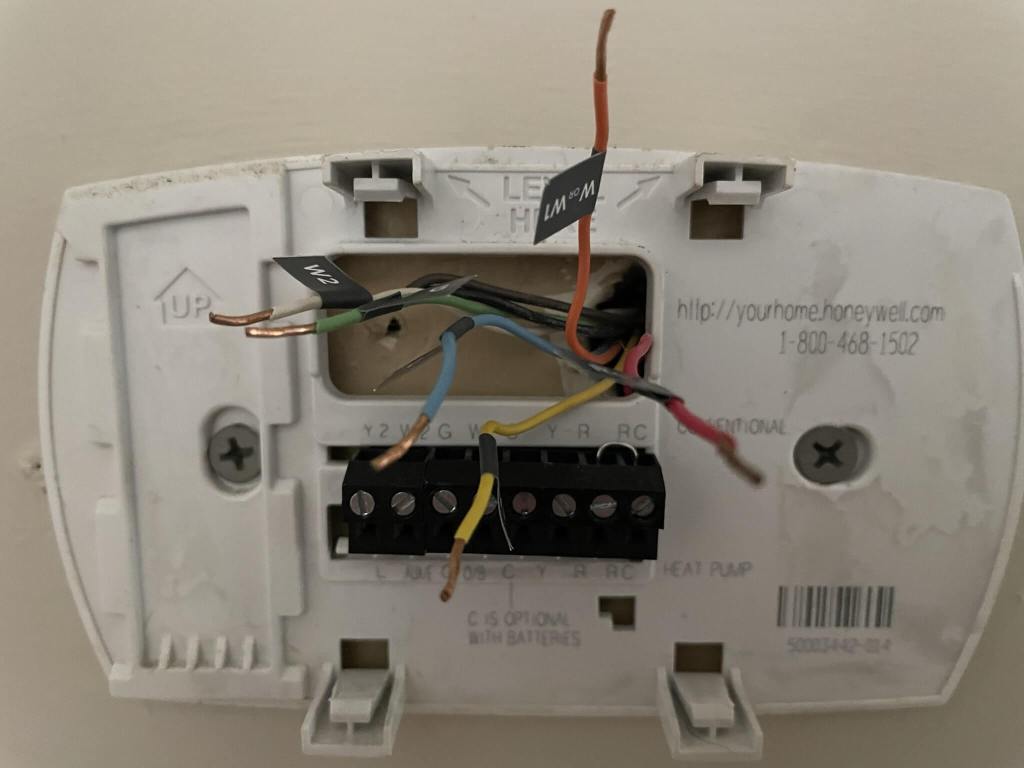
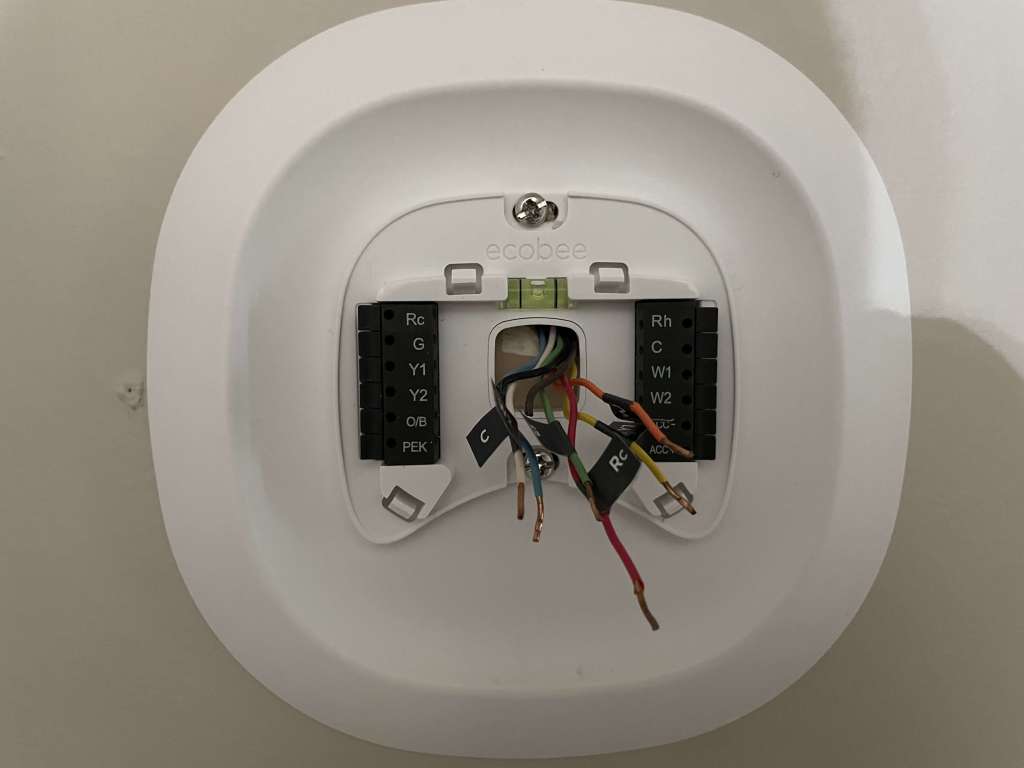
Once you access the back panel, you will see how all the cables are wired unless you know what you are doing. MAKE SURE TO TAKE A PICTURE. It will save you big time and also be a good reference for when you need to wire the smart thermostat. Make sure they are in the right places, and you will be okay. I ran into a situation where W2 and Y2 are jumped together. If your thermostats happen to have this, chances are your thermostat is using a heat pump. To wire this configuration, the orange wire will be connected to O/B, and W2/Y2 will be connected to W1. It took me a couple of tries to figure this out when I installed the thermostat for my parent at their house. So this might helps you out if you are running into the same issue I have. Save yourself some headaches 😅
Install the smart thermostat.

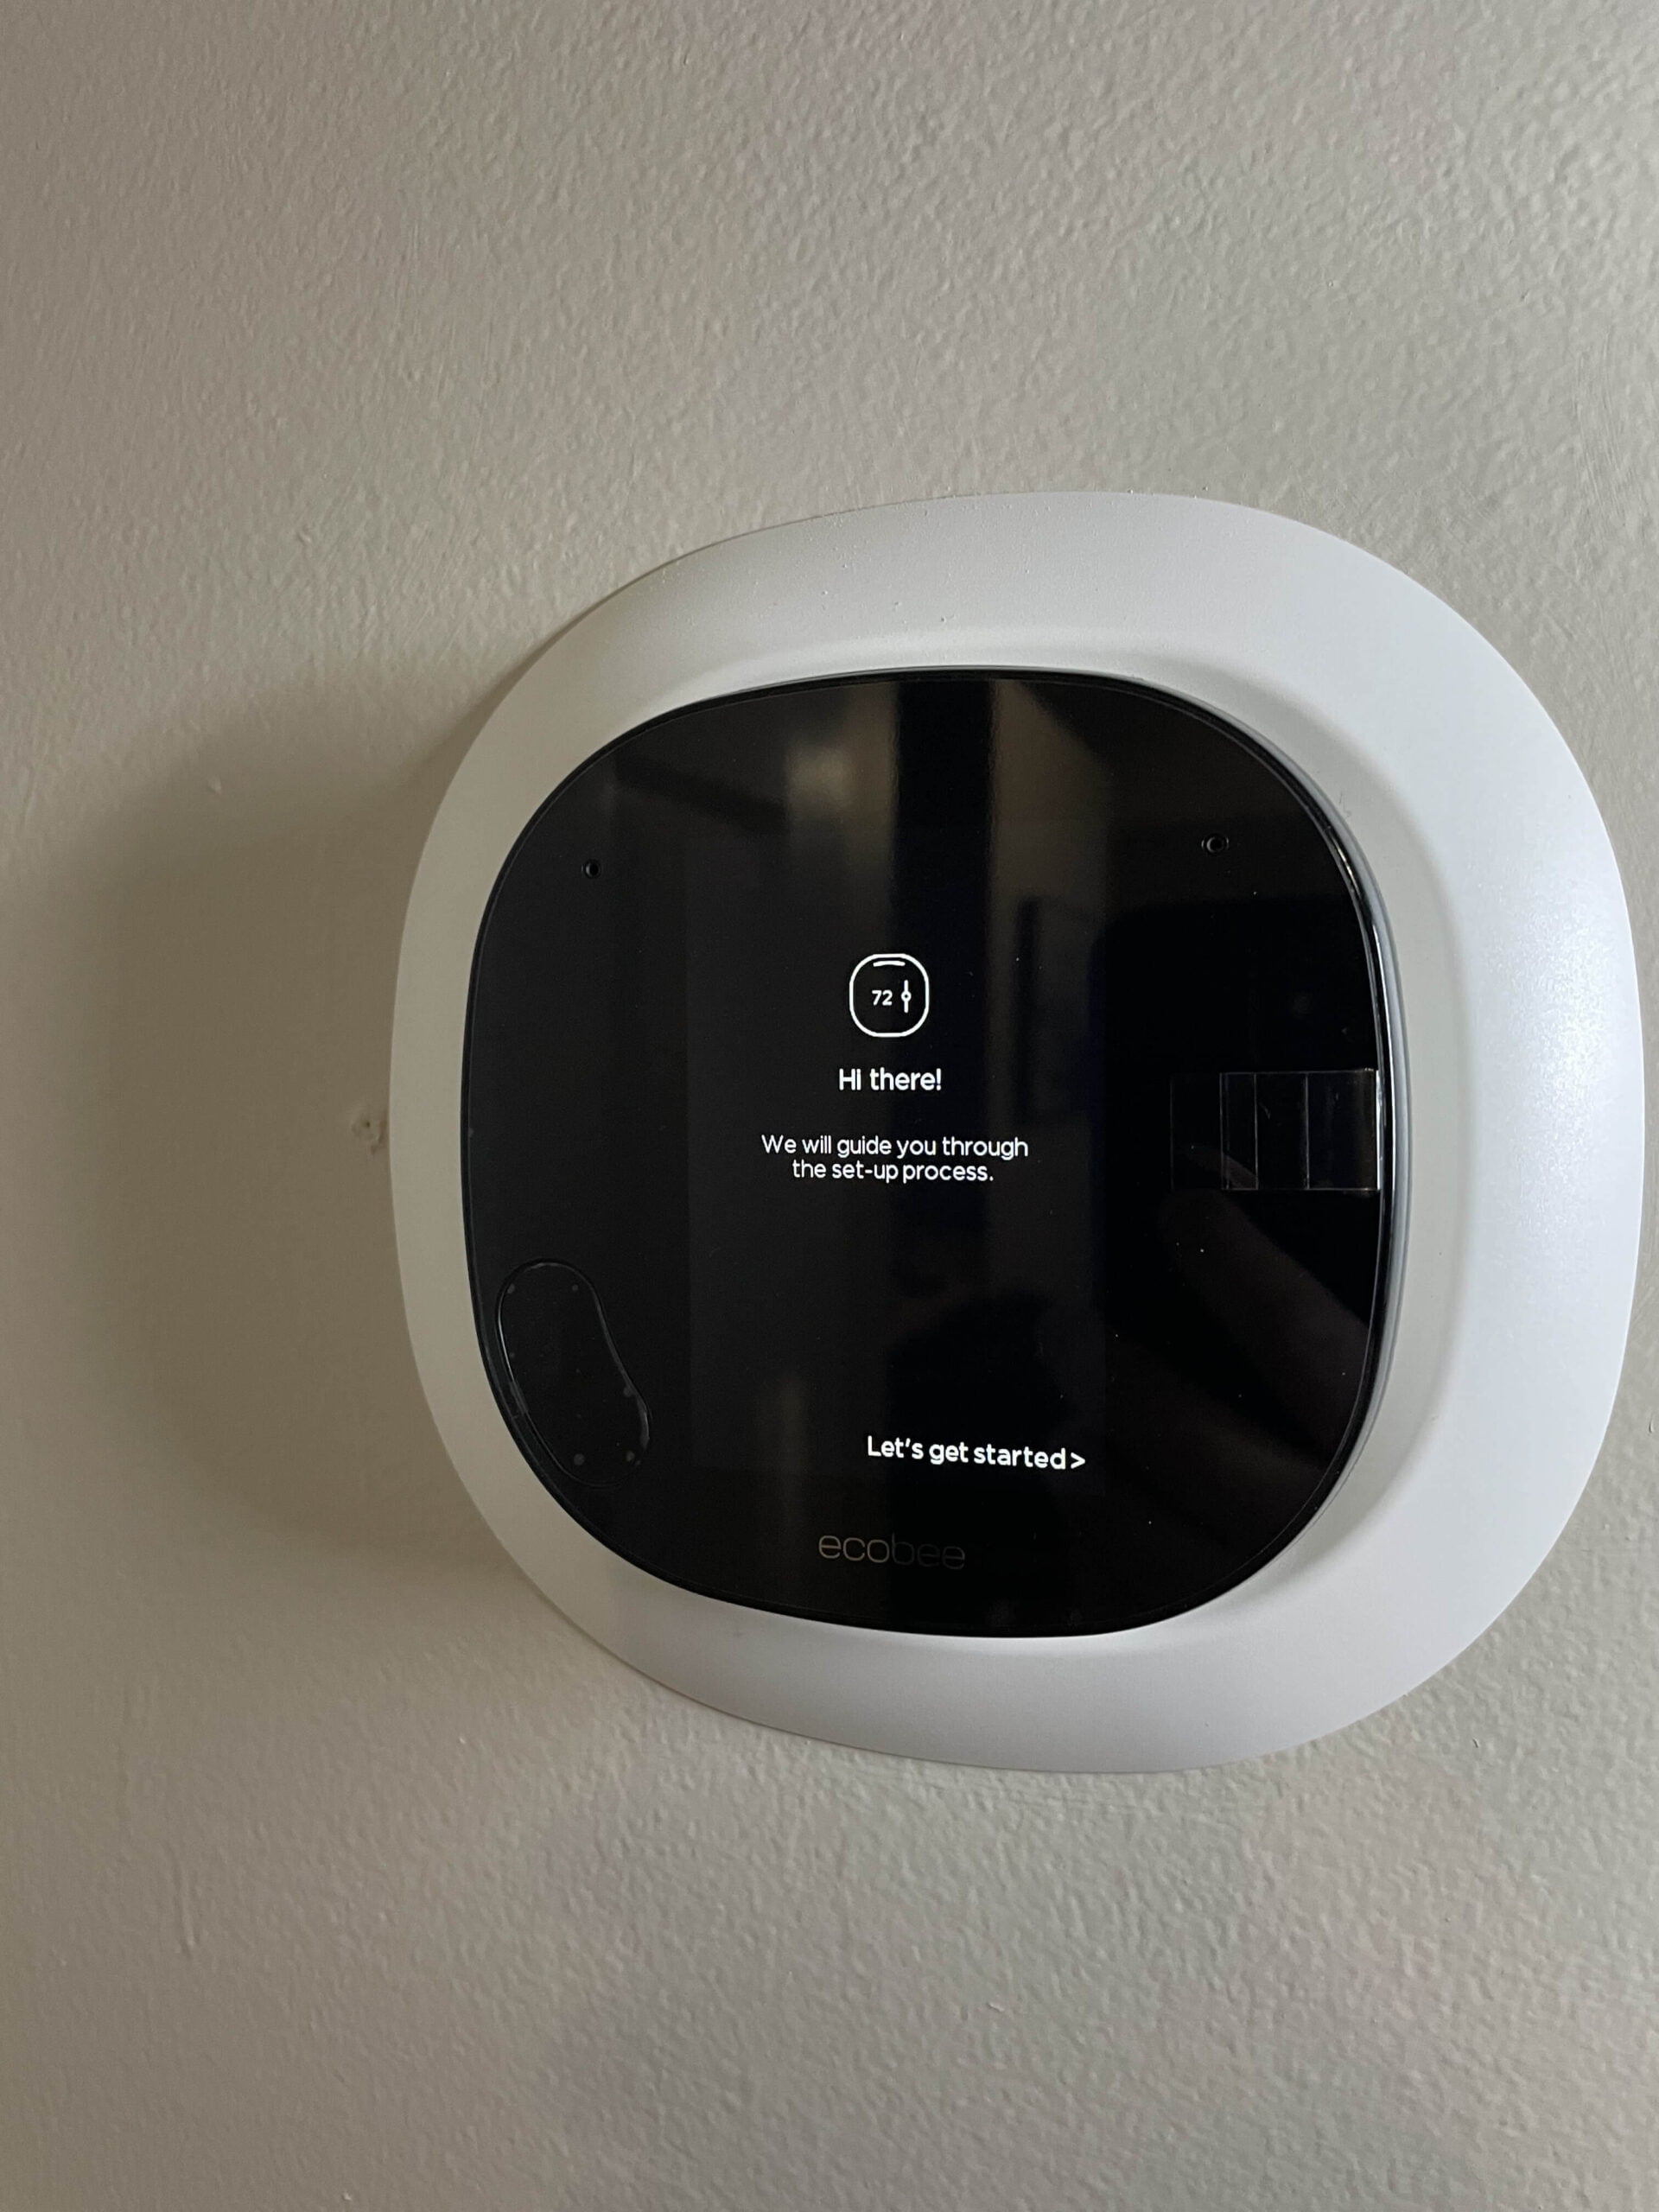
And that is it. When you see the device powered on, and there is a welcome prompt, you know you installed it correctly. See, I told you it was not too bad, right? If you managed to install it successfully, then congratulations. You deserved applause 👏. Now that we are done with the physical installation, all we need is to set up the device. I will continue next week; sorry, I am keeping my post short since I realized most people have a short attention span (myself included). So it might be a good idea to break it up into multiple shorter posts. Of course, that also mean you have to wait for another week, but well not that many people care about that anyways 🤷♂️(prove me wrong, then). With that said, I hope you enjoy this week’s post. Until next time.
-Laz
6 responses to “Smart home misadventures : Ecobee Smart Thermostat. Part 2”
[…] 1Part 2Part […]
Thank you for your sharing. I am worried that I lack creative ideas. It is your article that makes me full of hope. Thank you. But, I have a question, can you help me?
Your point of view caught my eye and was very interesting. Thanks. I have a question for you. https://www.binance.com/en/register?ref=JHQQKNKN
Your article helped me a lot, is there any more related content? Thanks! https://www.binance.com/register?ref=JW3W4Y3A
Your point of view caught my eye and was very interesting. Thanks. I have a question for you. https://www.binance.info/register?ref=QCGZMHR6
Your article helped me a lot, is there any more related content? Thanks!